Within your feedback form, it is possible to create your own design by using the custom features in the feedback form builder.
Step 1
Go to 'Data collection' and click on 'Feedback forms'.

Step 2
Select the pencil button of the feedback form you want to edit or click on 'New form' to start with the standard design of a new feedback form.
Step 3
You will see a navigation bar with three different options (build, design, deploy).
For now, we will focus on the 'Design' option so please click on this. For more information about building feedback forms please refer to the article How to build a feedback form? and How do form logics (question routing) work? to implement question routing.

Step 4
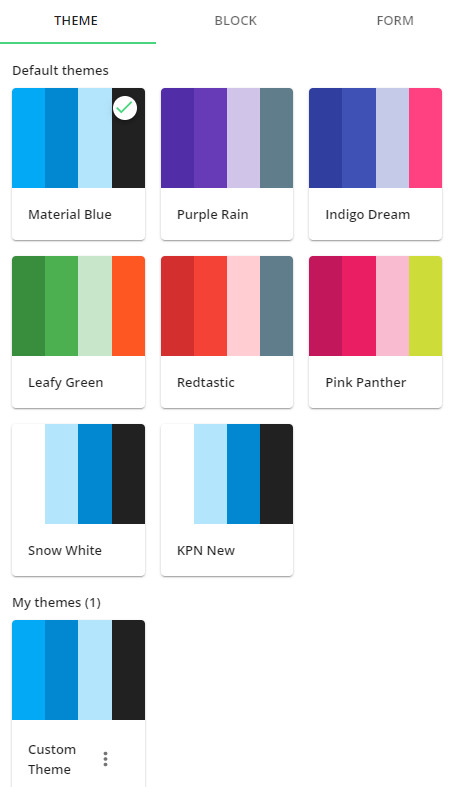
After clicking on the option 'Design' you are presented with a selection of different themes that you can use for your design template. Once you select a theme, your chosen theme will be marked with a check.
Step 5
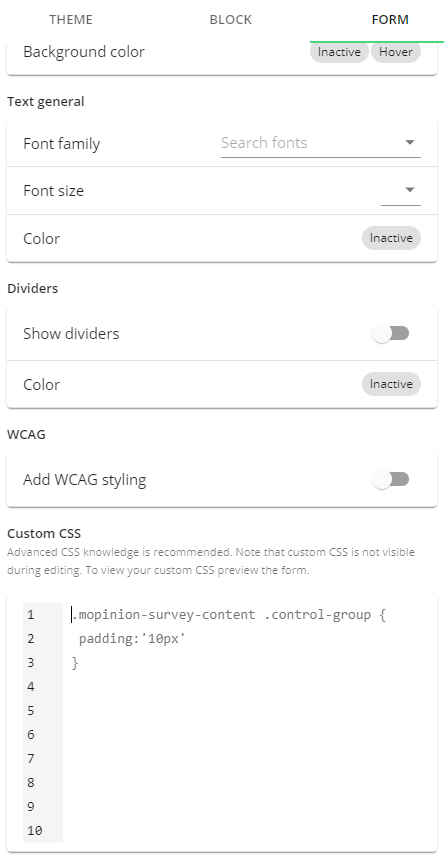
To apply Custom CSS rules, click on ‘FORM’, on the right-hand side of your screen. Fill in your Custom CSS rules.
Step 6
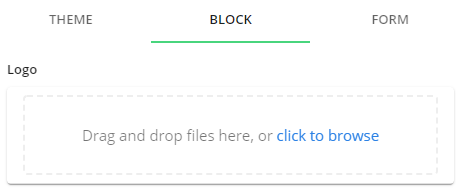
It is also possible to attach your own logo which will be shown when your feedback form is opened. To attach your logo, click on ‘BLOCK’, then, on the box 'Drag and drop files here, or click to browse'. Your browser, with your desk files, will automatically open so that you can choose and upload an image.
Step 7
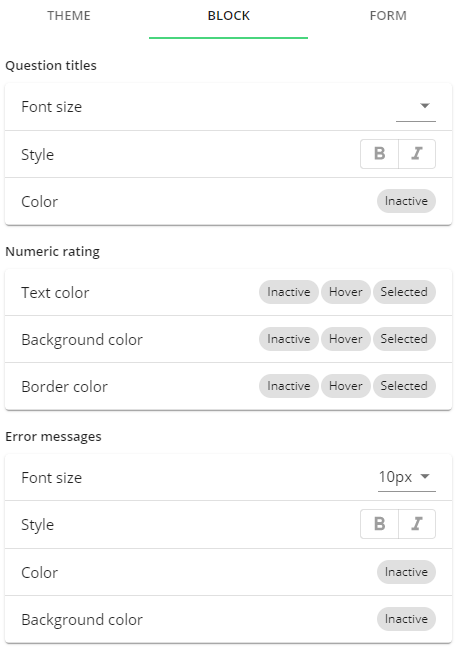
In the first five steps, we focused on the ‘General' components of the feedback form. Now that the general components have been set up, we will help you design the ‘Body' of the feedback form. Just click on 'BLOCK' or 'FORM’. Here you can customize the 'Header', the 'General text font', the 'Titles', the 'Dividers' and the 'Errors' (if you want an error message to be shown when the visitor failed to fill in an answer.
The steps you take to customize the 'Body' settings also apply to the categories:
Buttons
Inputs
Ratings
Choose your text style, font size and colour of the text. Customize your check-boxes, categories, drop-down lists, radio buttons and your ratings and you’re finished with creating your own design!
Step 8
If you're not satisfied with the position of the feedback button you can also change the position by clicking on 'FORM' and choosing another position using the 'Button position'.
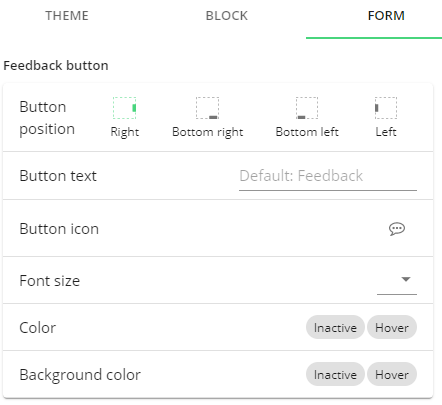
Here you can also change the text and icon of your feedback button. Click on the Button icon line to open a panel to select a new icon. Click on the Button text line to type a new button text.
If you want to take a quick look, just click on the blue 'Preview' button in the top right corner and preview your changes.
To implement the feedback form on your own website we recommend that you read the Deploying your feedback forms.
Oh, and make sure you don't forget to save your feedback form!
If you like to use your custom design template as a basis for another design, you can duplicate the template. Just click the ‘Clone design’ button and a new custom theme is created.
