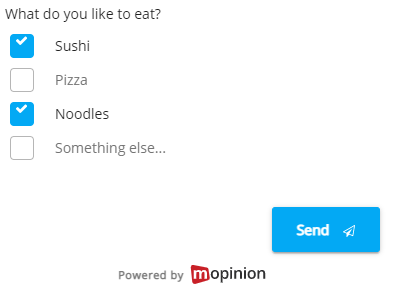
The checkbox element is similar to Radio button, however, with checkbox, the respondent can also select multiple answers. The categories element is similar to checkbox, the possible answers, however, are always shown as buttons.
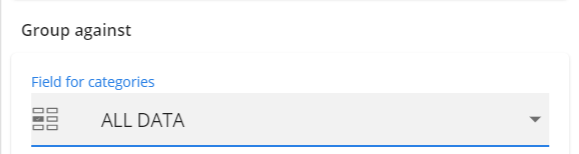
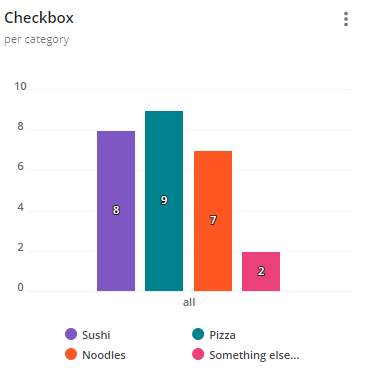
To create a graph, you need to add all possible answers to the graph, and for each data series, filter the series to the corresponding answer. Set them to ‘Count’ as data calculation, and group the data against ‘All data’, to see how often an answer was selected overall. You can best use the column chart for this:

Mopinion offers the possibility to add a feedback widget into an email. This element can act as a call to action that will send the recipient to a public landing page where a survey can be filled out.
In the following article, we will provide you with a case in which we will send an email, with a survey, to 20 customers. After these customers have responded to this survey, we will show you how we will collect the data according to different mailing campaigns. In the end, we will also be analyzing the data.
Below you will find the 20 customers with additional information we will be working with.

Step 1: New form
To get started, navigate to the feedback forms collections page. In the sidebar select the ‘Data collection’ icon and choose ‘Feedback forms’.
Here you can create a new form by clicking on 'New form’.
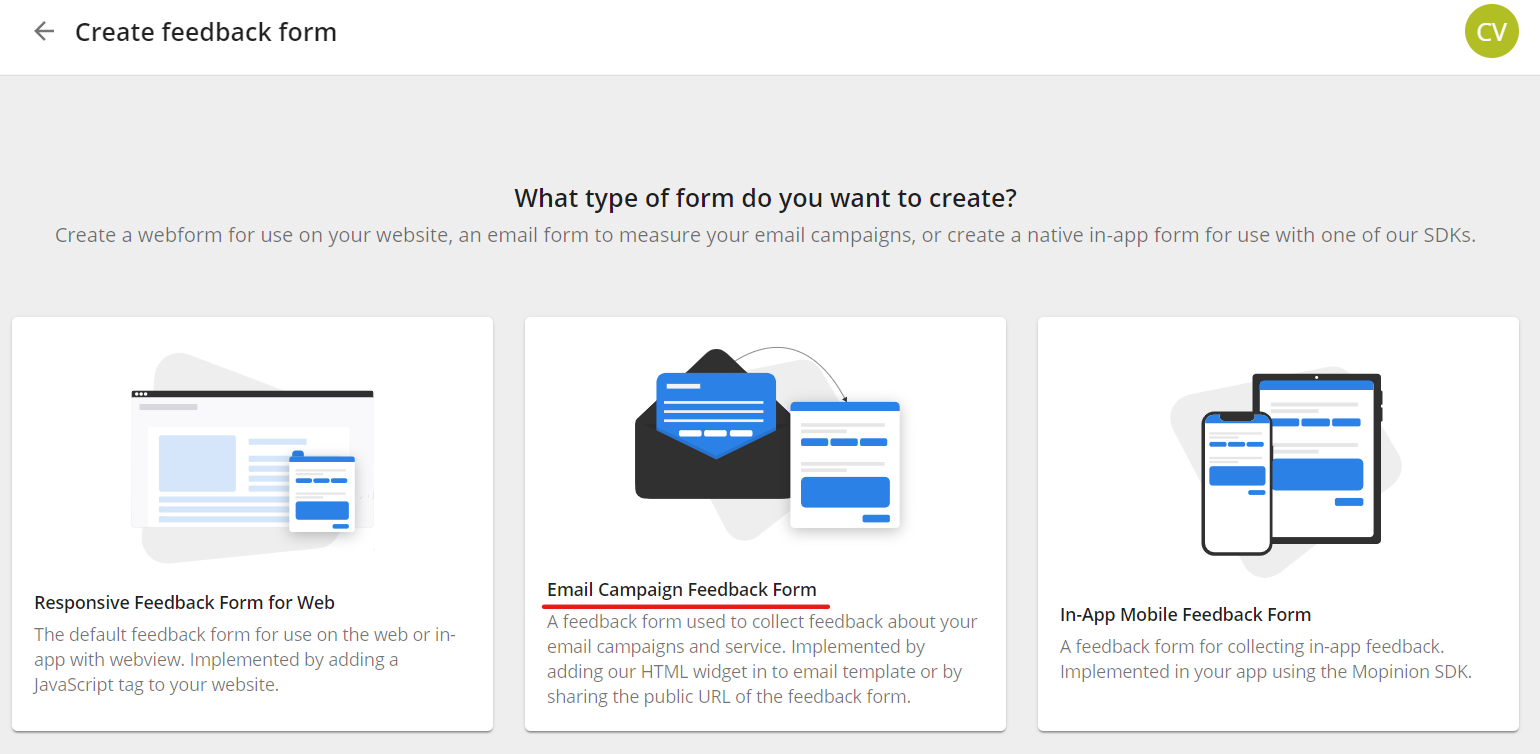
You’ll see an overview of three types of forms. Choose the middle one: ‘Email Campaign Feedback Form’. Then, click on ‘Start from scratch’, or use one of your templates. We will start from scratch.
Step 2: Select your survey elements
Elements that can be used in an email are the Rating, Net Promotor Score, Customer Effort Score, Goal Completion Rate, Thumbs and Categories element. You can find these elements in the form builder in the ‘Build’ step of the form creation process, under the ‘Add’ section.
Step 3: Options
When you have added one of these elements to the survey, you can click on it to see the options for this specific element. These options are listed under the ‘Block’ section. We will be using the Rating element, with emoji rating type. Our question will be “What’s your opinion on this email?”

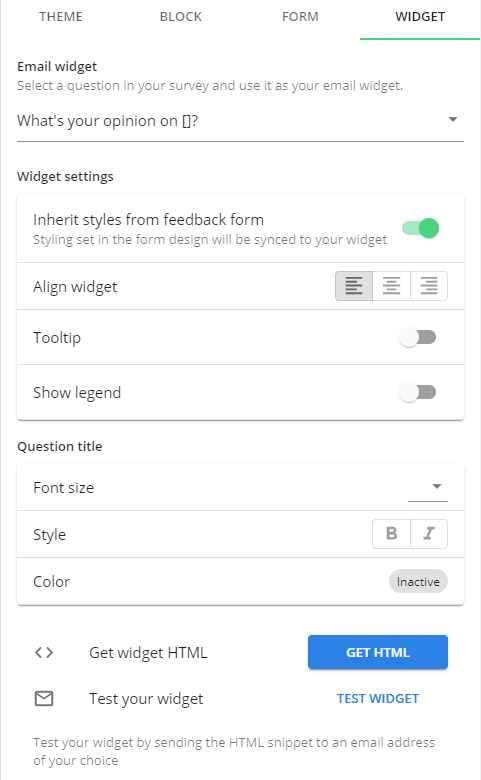
The option that we are looking for is Use a feedback widget in email. Toggle this option to generate the HTML for the widget. A button will be shown that says Design the widget.

When you press this button, you can customize your email widget. More information on this can be found in this article. To get the HTML of the snippet, click on Get HTML. You can now copy and paste it into your email template, or, continue editing your form.
Step 4: Add URL parameters and deploy
You can add more elements and edit your form if you like. In our case, we will add one more question; NPS: 'How likely is it that you will recommend us to family and friends?'. We also, want to keep track of some additional information. Under the ‘Build’ tab > ‘Add’, click on ‘Website data’. Here, we will add our URL parameters. You can add more or fewer parameters if you like.

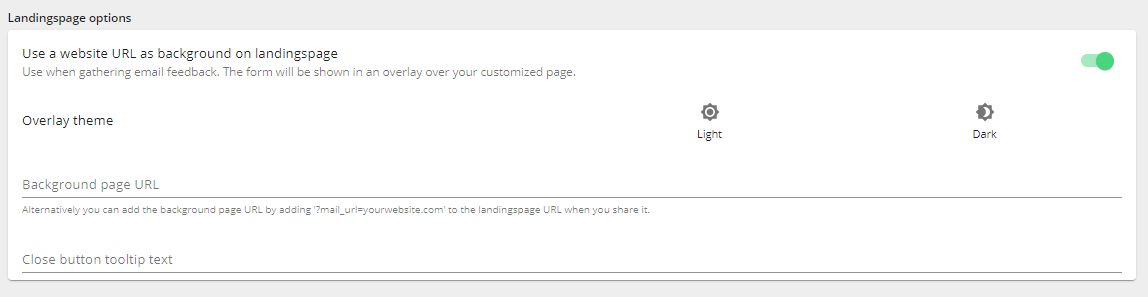
Landing page options
It is also possible to style the background of this page using the HTML of another website. The form will then be shown as an overlay over the page. To do this you can toggle the option Use a website URL as background on the landings page, under the ‘Deploy’ tab, and enter the URL for the background page.
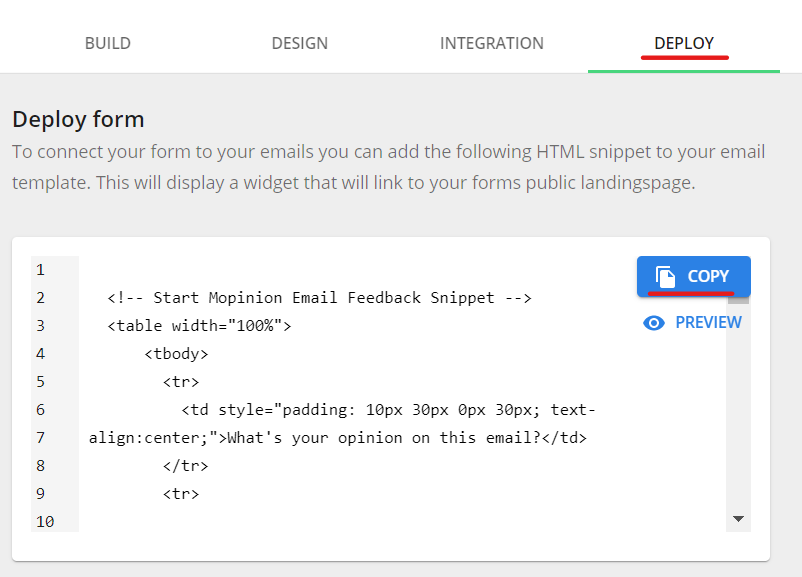
Now that we are all done with our form, we can go to the ‘Deploy’ tab. Here we will find an HTML snippet under ‘Deploy form’, which we can copy and add to our email template. You can also preview your email widget first.
Step 5: Add the HTML Snippet to your email with Pardot
To add the HTML Snippet, we will use an external website; Pardot.
Step 5a: Prospects
On the left-hand side, go to ‘Admin’> 'Import'> ‘Prospects’.

Step 5b: Upload CSV file
Here, you can upload the CSV file; in our case, this will be the mailing list with 20 customers.
Step 5c: Select fields
Next, you can select the fields you would like to import and overwrite.

Step 5d: Add to campaign
Add your list to a (new) campaign.

Step 5e: Select action
You can select an action to be performed on your imported prospects.

Step 5f: Select names
After having confirmed and saved your campaign, go back to the ‘Prospects’ tab, and click on your just imported CSV file, at the bottom of your screen. Select all the names you wish to import. In our case, we want to import all 20 customers.

Step 5g: New email template
On the left-hand side of your screen, go to ‘Marketing’> ‘Emails’ > ‘New Email Template’. Here you can write the email you would like to send out. Do not forget to add the HTML snippet found in Step 4.

Write your email in the ‘Editor’ tab, and add the HTML snippet in the ‘</> HTML’ tab.

Link data details to Mopinion email widget
Note: In your HTML Snippet, you will need to replace the ‘ENTER_VALUE’ with the correct Variable Tag. Once you send out the email, and the survey has been answered, this tag will be replaced by the customer’s own values.

Save your draft, and you can preview your email or send a test email to yourself. Under the ‘Sending’ tab, you can choose who your email is sent from. When all done, click on the green ‘Publish to Template’ button in the bottom-right corner.
Using the translation function with email feedback
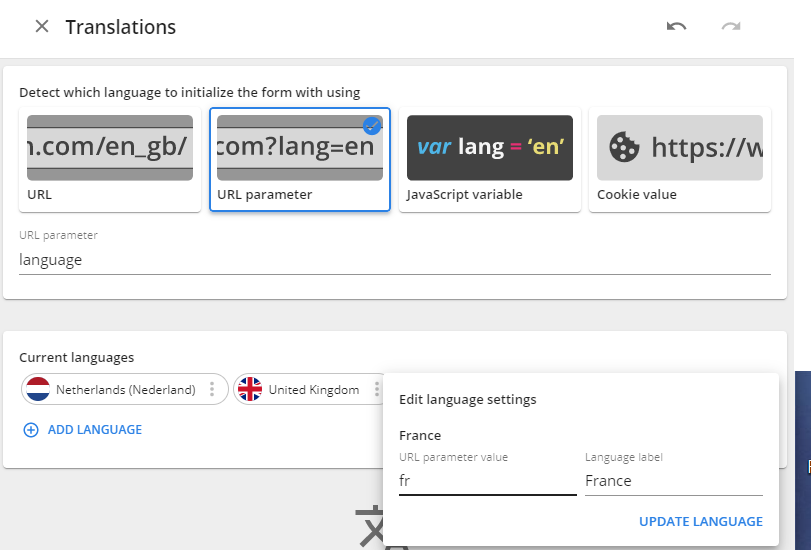
If you want to add another language to your form, go to the ‘Build’ tab, and then to ‘Form’. Next, click on the ‘(+) Add Language’ button. We would like to add the languages Dutch, French and English.

Select ‘URL parameter’. For more information, please read this article, under “URL parameter - translation trigger” and “Adding the translations”.
Customer Responses
Once our customers have answered our survey, by clicking on one of the emojis in our email, the feedback data will be automatically sent to our feedback inbox. In the case of additional questions, these answers can be sent by clicking on the ‘Send' button.

Data Analysis
Once the customers have answered the survey, we can view their responses in the feedback inbox.

We can also view their answers in a graph, in your dashboard:
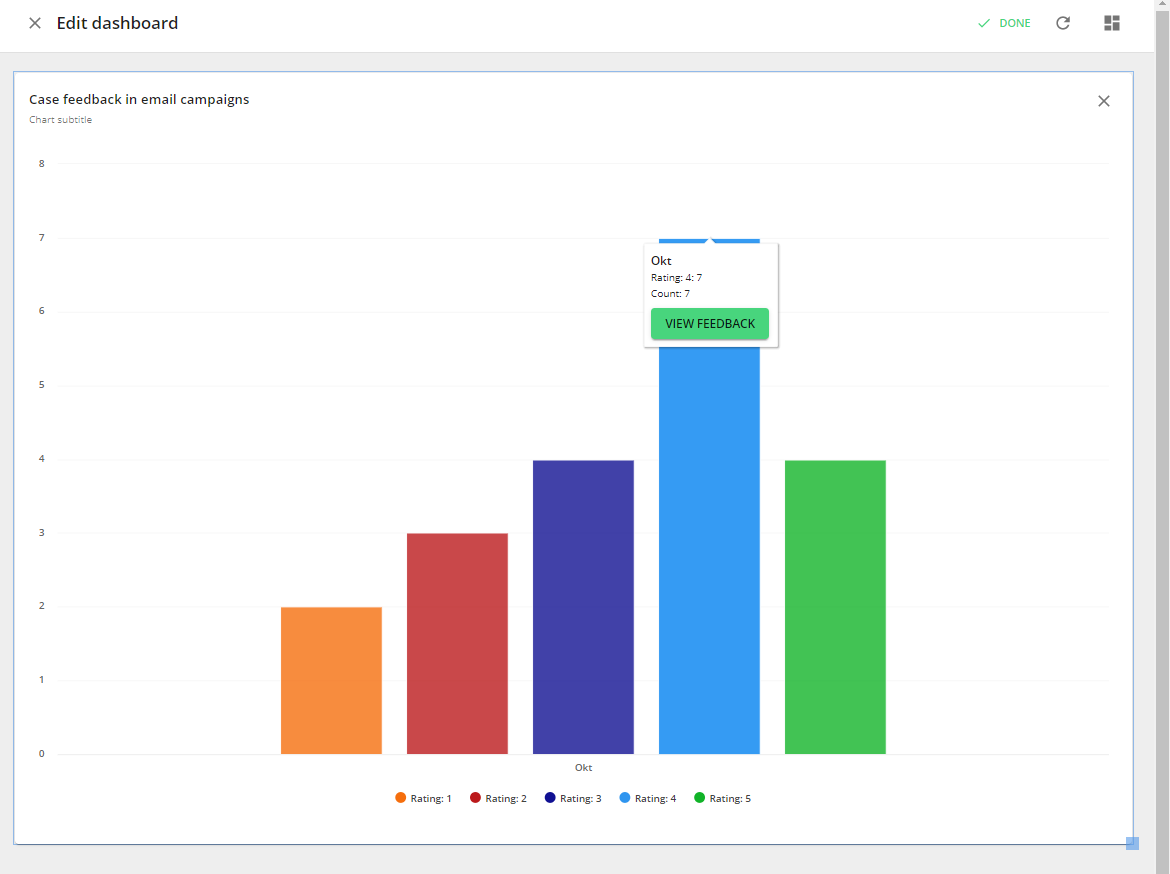
Here we can analyze our data. From the 20 respondents, the most gave our email a rating of a 4/5. If we click on ‘View Feedback’ on one of the bars, we can see which respondents have scored this rating. We are also able to see more information on each respondent.

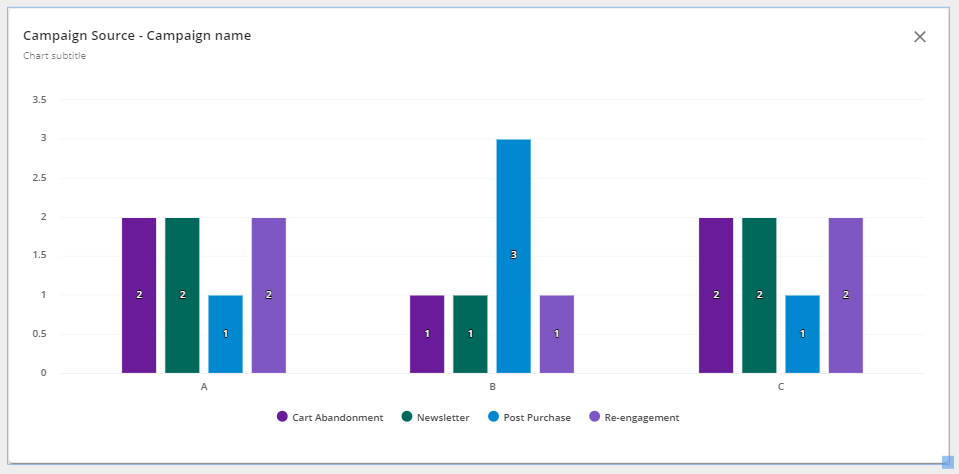
You could, for example, also analyse the campaign source for each campaign type:
Edit Form - HTML Update
After you edited and saved your form, you can check the email snippet again. You will see that the links in the snippet have been updated with your URL parameters. For the translations, you need to manually update your link. You first need to copy the HTML of the snippet and put it in your email template.
href="https://demo.mopinion.com/survey/public/take-survey/8b0506b4aaa223c2aa3b393f6264eec1216d0e2b?user_id=ENTER_VALUE&user_email=ENTER_VALUE&campaign_name=ENTER_VALUE&campaign_source=ENTER_VALUE&nps=ENTER_VALUE&rating_9525=1"
Once you’ve put the HTML in your email template, you can add the translation URL parameters. To do this, you need to add &URL_Parameter=URL_parameter_value to the end. So in our case:
href="https://demo.mopinion.com/survey/public/take-survey/8b0506b4aaa223c2aa3b393f6264eec1216d0e2b?user_id=ENTER_VALUE&user_email=ENTER_VALUE&campaign_name=ENTER_VALUE&campaign_source=ENTER_VALUE&nps=ENTER_VALUE&rating_9525=1&language=fr"
Make sure to replace the placeholders (value) with the actual values you want to add to the feedback.